


Van builders will tell you to settle your storage layout before you frame a single wall panel, and there's a reason for that. The drawer-versus-overhead-bins decision in a camper van conversion shapes everything downstream: bed platform height, electrical routing, usable floor area, and how the van actually feels to live in on day forty of a trip.
The tension here is real. Drawers win on ergonomics and weight distribution. Overhead bins win on cubic footage. But that tradeoff flips depending on your van's interior standing height, and most sprinter-based builds work from different constraints than a lower Transit or a cargo-floor Promaster. Van height is the variable that splits this decision before anything else does.
This article is for people mid-build or in serious planning, not for someone casually browsing van life aesthetics. If you're after decorating inspiration, this isn't it. If you're trying to decide where your tools, food, and clothing actually live for months at a time, keep reading.
Why the Floor-to-Ceiling Clearance Number Changes Everything
The practical heuristic most experienced builders use is roughly 72 inches of interior standing height as a dividing line. Below that, overhead bins demand ducking or become genuinely unusable for anyone over 5'8". Above it, overhead bins become viable storage without creating a crouching habit that grates after the first week.
Or rather: it's not just whether you can reach the bins. It's whether the bins reduce the felt spaciousness of the interior enough to make daily living worse. A high-roof Sprinter (144-inch wheelbase, extended) typically clears 74 to 76 inches of usable interior height after insulation and ceiling panel. That gives you a genuine window for overhead storage. A standard-roof Transit rarely clears 65 inches in the same conditions. At that height, overhead bins compress the living zone into something that reads as a corridor, not a room.
Drawers don't have this problem. They live below counter height, they don't affect perceived ceiling clearance, and they keep your heaviest items low. Weight distribution in a van matters more than most first-time builders expect: a heavily loaded overhead bin on one side can affect handling, particularly in taller high-roof vans where the center of gravity is already higher than a stock cargo configuration. Keeping dense gear (tools, canned goods, water treatment supplies) in drawers near the floor is the mechanically sound choice regardless of aesthetics.
What you lose with a drawer-dominant layout is raw cubic footage. A well-designed overhead bin system running the length of a 144-inch-wheelbase van can add 15 to 25 cubic feet of storage, a common builder estimate based on typical cabinet depths of 12 to 14 inches. Drawers in the same footprint occupy floor-to-counter space, which in most builds means competing directly with the bed platform, kitchen zone, and seating.
What Drawers Actually Do Better
Drawer systems earn their place through three things: accessibility, load capacity, and security while moving.
A well-built drawer on full-extension slides (the kind rated for 100 lbs or more) lets you pull your entire kitchen kit, tool roll, or clothing stash into full view without removing anything from on top. That's not a minor convenience. After a few weeks of van living, digging through a bin for the one item at the bottom becomes a genuine daily friction point. Drawers eliminate that entirely.
The builders who commit hard to drawer systems tend to be the ones doing longer trips or full-time van life, not the weekend warriors. That tracks. Short trips tolerate organizational chaos. Extended living doesn't.
Drawers also handle road vibration better than bins with latched doors. A drawer on quality slides stays shut under hard braking in a way that a cabinet door with a standard magnetic catch doesn't always manage. For anyone driving rough forest service roads or frequently braking on mountain descents, this is a practical safety point, not a preference issue.
The cost tradeoff is real. Quality drawer slides (Blum, Accuride, and similar hardware) run $30 to $80 per pair, and a full drawer bank for a 144-inch van might need eight to twelve pairs. That's $240 to $960 in hardware before wood, finishing, or installation. Overhead bins built from lightweight plywood and basic Euro-style hinges cost considerably less per cubic foot of storage delivered.
When Overhead Bins Are the Right Call
Overhead bins make sense when your van has the clearance to support them and your storage needs are dominated by lightweight, bulky items. Sleeping bags, extra pillows, clothing layers, rain gear, packable jackets: these are exactly the items that reward overhead placement. They're light, they compress, and they don't need frequent access.
The comparison that matters here isn't "bins vs. drawers" in the abstract. It's bins versus adding a second drawer bank that would push your bed platform forward six inches and cut your kitchen counter by the same amount. In a 144-inch-wheelbase build, six inches of floor space is not trivial. For couples building together, losing that counter length often becomes the first real source of conflict on a long trip. Bins spare you that compromise.
That framing misses something. The real question isn't which system holds more stuff. It's which system holds the right stuff where you need it, without making the van feel smaller than it is. Overhead bins loaded with heavy canned goods or tools fail on both weight distribution and daily ergonomics. The same bins loaded with soft goods that you access twice a week are nearly ideal.
Passenger-side overhead bins also open up the wall space below them for electrical panels, USB outlets, or a 12V refrigerator without sacrificing counter surface. That's a layout advantage that drawer-only builds struggle to match cleanly.
The Hybrid Layout and Where It Actually Fails
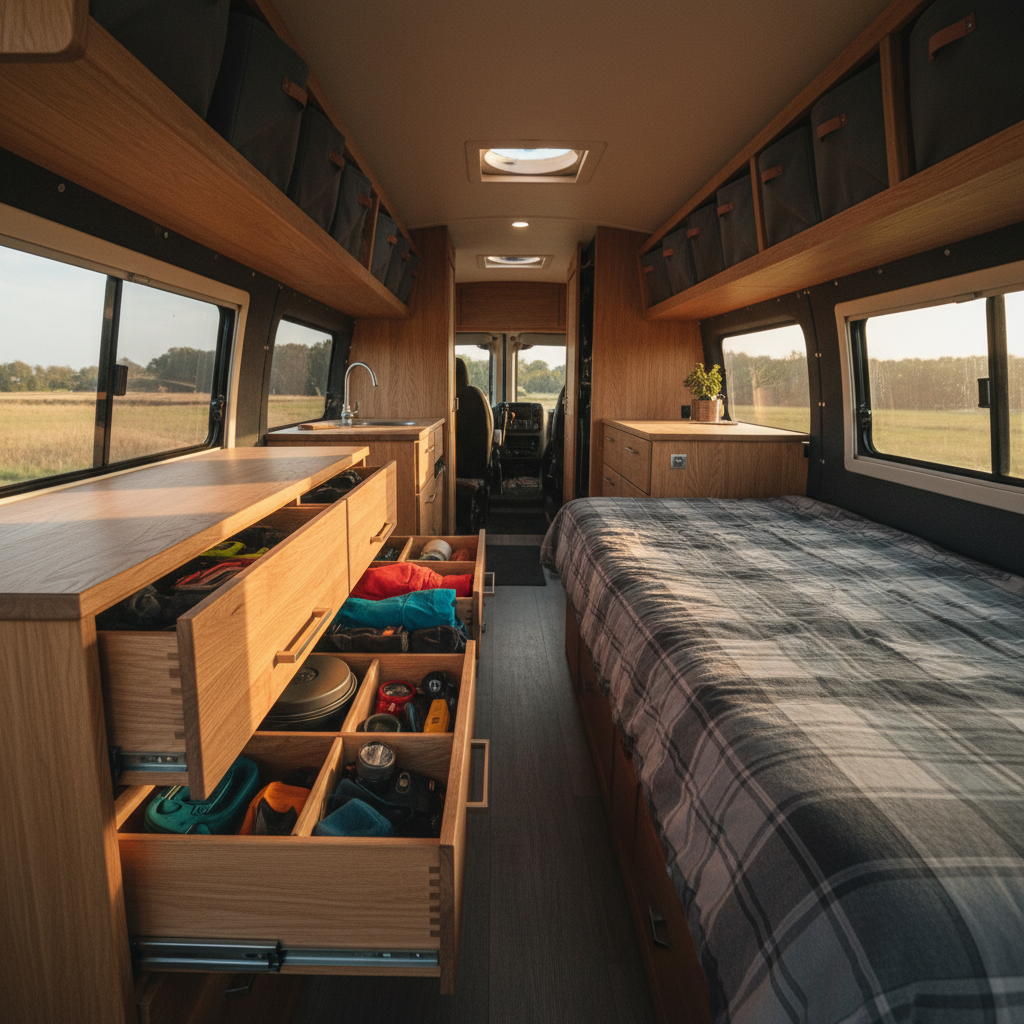
Most experienced van builders land on a hybrid: drawers under the counter on the driver's side, overhead bins above the passenger-side bed on high-roof builds. This is the layout that shows up repeatedly in well-documented builds on platforms like Faroutride and Gnomad Home, both of which have published detailed build diaries with measurements.
The hybrid fails in one specific condition: low-roof vans. If your interior clearance is under 68 inches after insulation, the overhead bins end up at a height where they either clip your head during normal movement or require a dedicated step stool to access safely. Neither is acceptable for full-time living. In that scenario, commit to drawers, add a roof-mounted cargo carrier for bulky soft goods, and use the full vertical wall space for slimmer cabinet shelving behind latched doors.
It also fails for solo builders prioritizing a permanent bed that runs wall-to-wall. A fixed queen-width platform leaves almost no room for a full drawer bank alongside it. What you can do: a two-drawer unit at the foot of the bed that doubles as a step, plus overhead bins for everything else. Buyers skip this combination until they've already committed to their bed dimensions and then discover the drawer plan doesn't fit.
I'd start with your bed size and your standing height before touching the storage question. Every other decision in a van build is downstream of those two numbers.
Building It Right: Hardware, Weight, and What to Skip
If you're going drawers, use full-extension ball-bearing slides and size them for at least 75 lbs per drawer even if you don't plan to load them that heavily. Underbuild the slides and you'll get drawer sag within six months of road use. Blum Tandem and Accuride 3832 are the two slide families that show up most in serious builds for a reason: they handle vibration, they self-close cleanly, and they're genuinely serviceable when something goes wrong on the road.
For overhead bins, the weight question is structural. Bins mounted to van ribs with through-bolts into aluminum extrusion (the approach popularized by the Sprinterhome and similar van conversion communities) handle dynamic road loads far better than bins screwed directly into thin sheet metal. Van sheet metal is not a structural substrate. A bin loaded with 40 lbs of gear swinging on poor-quality L-bracket fasteners is a road hazard, not just a build quality issue.
Skip piano hinges on overhead bin doors. They bind, they rust in humid coastal environments, and they're a pain to adjust. Euro-style concealed hinges with soft-close dampers are the correct choice and they're not significantly more expensive at the quantities a van build requires.
What you don't need: full-extension drawer slides on every single drawer. Reserve the premium slides for your most-used drawers (kitchen, clothing, tools). Fixed shelving with a lip works fine for the storage you access less than once a week, and it's lighter and cheaper.
Making the Call for Your Build
If your van clears 72 inches of interior height after insulation, you're building with a partner, and your gear leans toward soft goods and clothing over tools and canned food, a hybrid layout with overhead bins on the passenger side and a drawer bank under the driver-side counter is the practical default. It's not universal, but it fits the largest category of high-roof camper van builds in the US market.
If you're in a standard-roof van or building solo with a fixed queen bed, skip the overhead bins. Commit to a well-built drawer system, add a roof cargo box for overflow, and accept that your interior will feel more open for the trade. Ignore this and you'll spend the first long trip ducking a bin you can barely reach, loaded with things you can't easily find.
Check standing height, partner count, and gear category before you cut a single panel. Those three inputs decide the layout. The hardware decisions follow from there.