


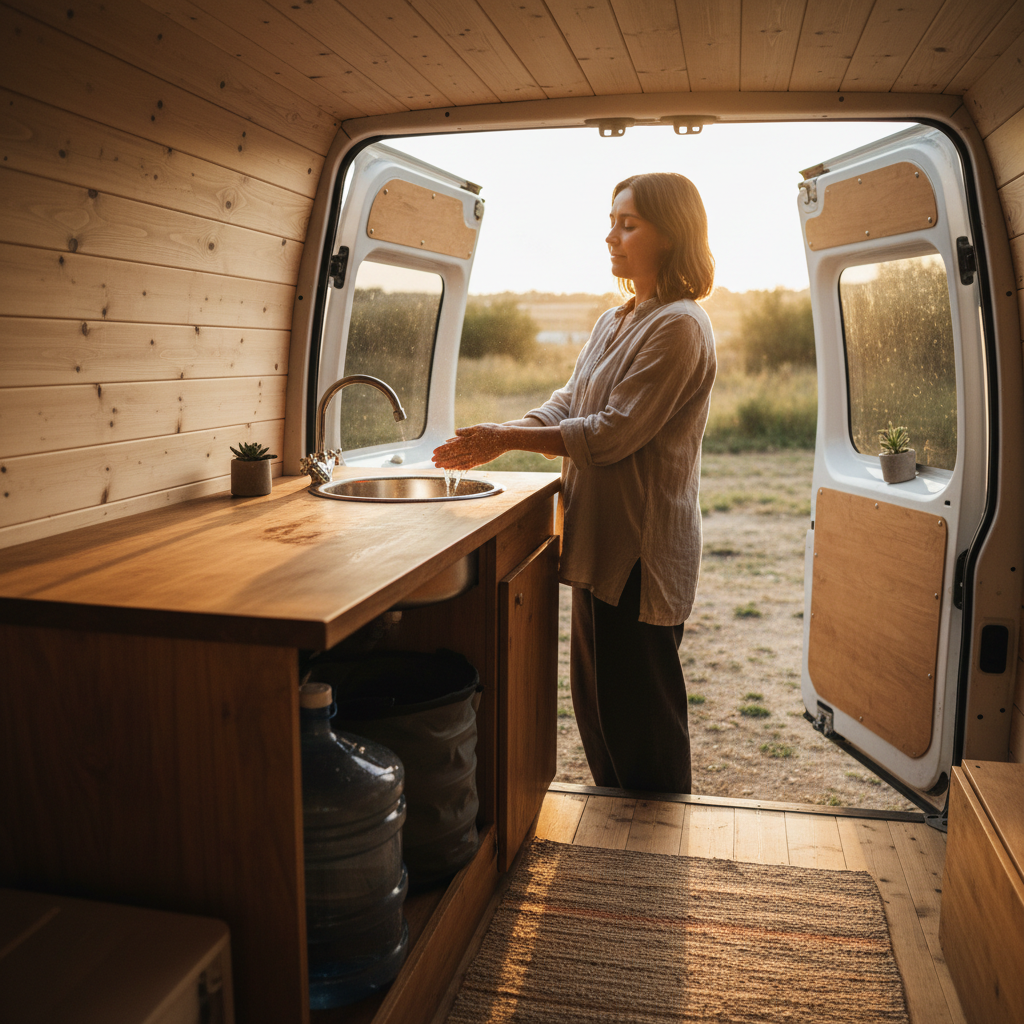
Van builders will tell you to nail your water system before you tile a single surface, and there's a reason for that. A camp sink that looked fine in a YouTube build tour can become a daily frustration the moment you're parked on a slope with a full gray tank and nowhere obvious to drain it. The portable camp sink and water setup you choose for a van galley isn't really about the sink at all.
The real decision sits underneath: tank volume, pump pressure, and drain routing. Get any one of those wrong and the hardware on top doesn't matter. A 2-gallon fresh tank sounds workable until you're doing dishes for two people across a three-day stretch without hookups. A 12V pump that pulses instead of flows steadily will make hand-washing feel like a chore every single time.
There's also a tension here that most builds ignore until too late: the more permanent the sink installation, the harder it becomes to adapt your gray water management when regulations change at your next destination. Some state and county parks in the US explicitly prohibit gray water discharge on the ground, and the rules vary enough that a fixed drain routed straight under the van puts you in a bind before you've even unpacked.
What Actually Determines Whether a Van Sink Setup Works
Three variables control the outcome, and they interact in ways that aren't obvious until you're living with the result. Fresh tank capacity sets your autonomy ceiling. Pump type sets your daily usability. Drain routing sets your legal and logistical flexibility. Optimize for any one of them alone and you'll compromise the others.
Fresh tank capacity for a solo van dweller doing light cooking and hand-washing typically runs between 4 and 7 gallons before a refill feels urgent. For two people, that floor jumps closer to 7 to 10 gallons. These aren't official guidelines; they're practical heuristics drawn from common van life build documentation and community reporting. What's firm is the math: if you use roughly half a gallon per person per meal prep and hand-wash cycle, a 5-gallon tank gives a solo traveler about 10 uses before it's empty. That calculation matters when you're scoping tank placement in a build that already has limited floor space.
Or rather: calling it a "tank capacity" problem undersells the real issue. The constraint is refill access, not volume alone. A 7-gallon tank drains in two days if you're running water carelessly, but a 4-gallon tank lasts four days if you're using a low-flow 12V pump set to around 35 PSI and filling a basin rather than letting water run. Pump selection shapes consumption as much as tank size does.
12V diaphragm pumps are the standard choice for van builds, and for straightforward reasons: they're self-priming, they run on the vehicle's electrical system, and they shut off when you release the tap. The Shurflo 2088 series and the Flojet BW4000A are two models with long track records in the van build community, both drawing under 7 amps at typical operating pressure and available at most RV supply retailers nationwide. But they pulse slightly under light flow, which some people find annoying. A 12V accumulator tank (a small pressurized buffer, usually half a liter to one liter) eliminates that pulse almost entirely and costs under $30 to add. If you skip the accumulator, you'll notice the pulse every morning.
Portable Sink Options: What to Compare Before You Buy
The market breaks into three practical categories for van use: freestanding camp sinks with integrated tanks, countertop drop-in basins plumbed to separate tanks, and collapsible basin setups with gravity or pump-fed water. Each suits a different build philosophy.
| Type | Fresh Tank | Pump Required | Gray Drain | Best For |
|---|---|---|---|---|
| Freestanding camp sink (e.g., Companion folding sink) | Built-in, typically 5 gal | No (gravity) | Bucket or hose | Part-time or stealth builds |
| Drop-in countertop basin | Separate tank, 4-15 gal | 12V required | Gray tank or hose | Full-time builds with dedicated galley |
| Collapsible basin with gravity jug | 1-5 gal portable jug | No | Portable gray bucket | Ultralight or budget builds |
The freestanding camp sink is genuinely the right call for part-time van users who want fast setup and don't need plumbing. For full-time van life with cooking, the drop-in countertop basin plumbed to a dedicated tank beats the alternatives decisively: you get stable water pressure, hands-free operation via a foot switch or push-tap, and the ability to size your tank to your actual usage.
One thing buyers routinely skip until burned: check the basin depth before ordering. A shallow basin (under 5 inches) means splashing on any surface it drains to. For a van galley where the counter is also your prep surface, that's a problem. Stainless basins in the 6-to-8-inch depth range are the practical floor for comfortable daily use.
Gray Water Management: The Part Most Guides Leave Vague
Gray water handling in a van is where builds go sideways most often, and it's almost always because the builder treated it as an afterthought. The core options are a dedicated gray tank, a portable bucket or collapsible jug, or a direct drain hose routed out the van floor. Each has a legal dimension that matters before you pick one.
In the US, gray water regulations are governed at the state and local level, not federally. National forests managed by the US Forest Service generally permit gray water dispersal on the ground if it's at least 200 feet from water sources, trails, and campsites, in line with Leave No Trace principles. But Bureau of Land Management areas, state parks, and especially county and city campgrounds often prohibit any ground discharge. If your drain hose exits the van floor and empties onto the ground by default, you're already noncompliant at a significant portion of developed campgrounds.
A 5-to-7-gallon collapsible gray tank (brands like WaterStorageCube and Reliance Aqua-Tainer are commonly available at outdoor retailers like REI and Walmart) sits under or beside the sink cabinet, connects to the drain via a short hose, and empties at designated dump stations or RV parks. That setup costs under $25 and keeps you legal everywhere. I'd start with a collapsible tank rather than a fixed gray tank, because you can reposition it as your build evolves and you're not committing floor space before you know how much gray water you actually generate.
The consequence of ignoring gray water planning entirely isn't just a fine, though those exist. It's that you end up draining into a bucket under the sink that overflows mid-meal, or you're parked somewhere you can't legally empty onto the ground and you have nowhere to go. That scenario is unpleasant enough that most full-timers who skip this step fix it within the first month.
Putting the System Together: Sequence and Sizing
Build the water system in this order: size fresh tank first, then select pump, then size gray tank to match, then pick the sink basin last. Most people do it in reverse, buying a sink they like and then trying to retrofit plumbing around it. That's how you end up with a 12-gallon fresh tank and a 3-gallon gray tank, which means you're emptying gray every few hours.
A matched system for a full-time solo build looks like this: a 6-to-7-gallon fresh tank (BPA-free polyethylene, vented to prevent vacuum lock), a Shurflo 2088 or equivalent 12V diaphragm pump at 35 PSI, a half-liter accumulator tank, push-to-connect fittings throughout (no hose clamps to tighten in cramped spaces), a stainless drop-in basin at 6-inch minimum depth, and a 5-to-6-gallon collapsible gray tank. Fresh and gray tank capacity within one to two gallons of each other means you're managing both on roughly the same schedule.
For a two-person full-time setup, scale fresh to 10 to 15 gallons and gray to match. At that volume, a fixed gray tank mounted under the van with a petcock drain valve becomes worth the installation effort, because you'll be emptying it daily otherwise and the collapsible jug gets old fast.
And here's the condition where this whole system design breaks down: if your van is a stealth build where opening a cabinet to access a gray tank isn't practical, or if you're doing short weekend trips rather than extended travel, the collapsible basin with a gravity-fed jug and a separate gray bucket is genuinely the better answer. Fewer fittings, nothing that can leak behind a cabinet wall, and the whole setup packs flat when you're not using it. Don't let full-timer advice push you into a fixed plumbing build you don't need.
Making the Right Call for Your Build
Pick the 12V drop-in countertop system if you're living in your van full-time and cooking regularly. Size fresh and gray tanks within two gallons of each other, add the accumulator tank, and route gray to a collapsible external tank rather than a floor drain. That combination works legally at the widest range of US camping destinations.
If you're a weekend user, skip the pump entirely. A gravity-fed collapsible jug, a 6-inch-deep stainless basin, and a gray bucket under the drain handle the actual water volume you'll use and cost under $60 total. The full 12V system isn't a waste of money for a part-timer; it's just more complexity than the use case requires.
The question worth sitting with before you buy anything is simpler than most build guides make it: where are you actually going to empty your gray water? Answer that first. Everything else follows from it.