


Experienced van dwellers will tell you that coffee is one of the first systems they dial in, and there's a reason for that. Getting coffee wrong in a small rolling kitchen doesn't just mean a bad morning drink. It means wasted water, wasted propane, and enough frustration before 7 a.m. to sour an entire travel day.
Making coffee in a camper van is genuinely different from making it at home. The differences that matter most aren't romantic. They come down to your electrical system's capacity, whether you're running water from a tank or hauling jugs, and how many square inches of usable surface your build actually has.
There's a real tension here that most van conversion guides gloss over: the methods that produce the best-tasting coffee typically require either the most power or the most hands-on effort. Neither is free. If you're boondocking on solar with a modest battery bank, reaching for a full-size drip machine is a mistake you'll only make once. But if you always park at full-hookup campgrounds, the calculus shifts entirely, and some of the minimalist methods people champion online become unnecessary self-denial.
This guide covers the options that actually work in a van context, what each demands from your rig, and which ones to skip. It's not for people who want a quick overview of camping coffee in general. It's specifically for van dwellers and camper van owners who are setting up a real daily coffee system, not a once-a-season novelty.
Why Your Power and Water Setup Decides Before You Do
Before any method makes sense, you need to know what your van can actually support. This isn't optional context. It's the decision gate everything else runs through.
A standard 12V camper van electrical system running off a 100Ah lithium battery and a modest solar array (200 to 400 watts of panels) can reliably power LED lighting, a 12V compressor fridge, phone charging, and a laptop. What it struggles with is resistance heating. Electric drip coffee makers and pod machines typically draw 900 to 1,500 watts, which means running them through an inverter. A 1,200-watt load sustained for four minutes pulls roughly 80 watt-hours from your battery bank. On a sunny day that's recoverable. On a cloudy week in the Pacific Northwest in October, it's a meaningful chunk of your daily capacity.
Or rather: the problem isn't the wattage figure alone, it's the peak draw. Many inverters in budget van builds are sized at 1,000 watts continuous. A coffee maker that spikes to 1,200 watts on heating will trip the inverter or trigger low-voltage cutoffs on weaker battery setups. Check your inverter's continuous rating before assuming any plug-in appliance will work.
Water is the second constraint. Van tanks typically run between 10 and 30 gallons. Drip machines with warming plates keep water hot for hours, evaporating a small but real amount. The waste is minor, but if you're already conservative with water in a dry camp, it registers. Aeropress and pour over methods use exactly the water you measure. Nothing more.
Propane-based methods (moka pot, percolator, stovetop espresso) sidestep the electrical problem entirely. A standard 1-pound propane canister can boil water dozens of times before it's spent. If your van has a two-burner propane stove, which most production camper vans do, you already have a reliable heat source that doesn't touch your battery bank.
The Methods Worth Considering, Compared
Here's how the main options stack up against the constraints that actually matter in a van. The comparison below assumes a typical van setup: 12V system, 100 to 200Ah usable battery capacity, a propane stove, and limited counter space.
Consider the trade-offs across the dimensions you'll actually live with daily.
| Method | Power Needed | Water Used | Coffee Quality | Counter Footprint | Best Fit |
|---|---|---|---|---|---|
| AeroPress | None (just hot water) | 6 - 8 oz per cup | Excellent, consistent | Tiny (stores anywhere) | Solo or duo van lifers, any power setup |
| Moka Pot | None (propane stove) | 3 - 5 oz per shot | Strong, espresso-style | Small | Espresso drinkers with propane stove |
| Pour Over (V60, Chemex) | None (just hot water) | 10 - 16 oz per cup | Outstanding, clean | Minimal when collapsed | Coffee-focused builders, quiet mornings |
| French Press | None (just hot water) | 12 - 32 oz per batch | Full-bodied, forgiving | Moderate (fragile) | Groups, casual drinkers |
| 12V Drip Maker | ~12V DC, 8 - 10A draw | Per carafe | Decent, automatic | Moderate | Rigs with solid 12V budget |
| AC Drip / Pod Machine | 900 - 1,500W via inverter | Per carafe | Good (familiar) | Large | Full-hookup campers only |
The table makes one pattern visible immediately: the three methods with the highest coffee quality ratings (AeroPress, pour over, moka pot) are also the three that require zero electrical power. That's not a coincidence. Manual brewing methods were refined over decades before electric alternatives existed, and the lack of automation means you control every variable that determines cup quality: grind size, water temperature, contact time, and ratio.
A 12V-specific drip maker deserves a closer look because it's tempting as a middle-ground solution. Brands like RoadPro and Wagan sell units designed to run directly off a 12V cigarette lighter or hardwired 12V circuit, drawing around 8 to 10 amps rather than routing through an inverter. The coffee is passable. But these machines typically heat water slowly, which means brew temperatures often fall short of the 195 to 205°F range that extraction science points to as optimal. You get convenience at a quality cost. For some van lifers that trade is worth it.
The AeroPress Case: Why It Wins for Most Setups
If you asked me to pick one method for a van build starting from scratch, I'd start with an AeroPress. Not because it's trendy, but because it solves the actual problem set.
It weighs 7 ounces. It's virtually indestructible. It brews one to three concentrated shots in about 90 seconds, and cleanup is a one-second grounds ejection into a trash bag with a quick rinse. In a 70-square-foot van, those properties matter more than they do in a home kitchen.
The quality ceiling is real. With a decent burr grinder and water at around 200°F, an AeroPress produces a cup that competes with café-quality espresso-style coffee. The Specialty Coffee Association has published research on extraction variables that applies here: grind uniformity and water temperature matter far more than brewing device prestige. A $35 AeroPress with a $50 hand grinder beats a $500 pod machine that can't consistently reach proper brew temperature.
That framing misses something. The AeroPress isn't just about minimalism for its own sake. It's about reproducibility under variable conditions. When you're parked on a slant in a forest, brewing one-handed while your travel partner navigates from the passenger seat, the AeroPress's simplicity is a functional feature, not a lifestyle choice. A pour over dripper demands a level surface and both hands. A moka pot demands attention on the burner. An AeroPress demands almost nothing except hot water.
The one honest limitation: it makes one to two cups per cycle. If you're traveling with more than two people, or if you want a full thermos for a long drive, you'll be running multiple cycles. That's workable. But it's a real constraint, and it's worth naming.
If you skip having any dedicated method and just use instant coffee to save space: the consequence isn't just inferior taste. Instant coffee's flavor compounds degrade noticeably once a jar is opened and exposed to van humidity and temperature swings. Within a few weeks you'll have flat, stale coffee anyway. The space-saving argument dissolves.
Moka Pot and Pour Over: When Each Makes More Sense
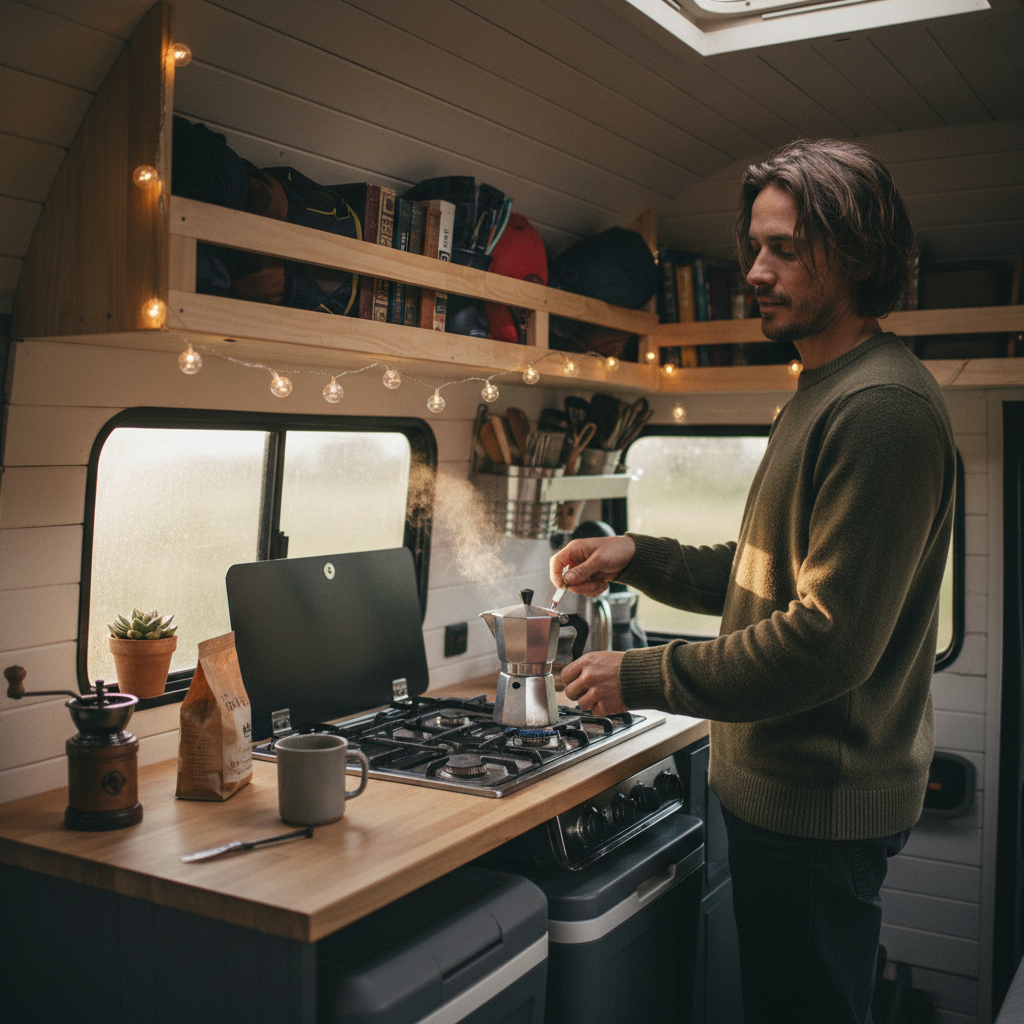
The moka pot earns its place in one specific scenario: you want something close to espresso, you have a propane stove, and you drink two to four cups a day consistently. Bialetti's 3-cup and 6-cup aluminum models are the standard, and for good reason. They're cheap, durable, and produce a concentrated brew that takes milk well if you're making lattes.
Moka pots do require some attention. The classic mistake is walking away while it brews. When the gurgling sound changes pitch, the water is nearly spent, and if you don't pull it off the flame immediately, you'll scorch the coffee with steam. That's a skill that takes maybe three mornings to develop. After that it's automatic.
One thing worth knowing: aluminum moka pots can impart a slight metallic flavor until they're seasoned after several uses. Some people never notice it. Others find it off-putting for the first week. Stainless steel versions (Bialetti makes them, as do several competitors) eliminate that break-in period and are compatible with induction cooktops if your van ever has one.
Pour over (V60, Chemex, or a simple Melitta cone) is the right call if you prioritize cup clarity and you don't mind a slightly more involved process. The clean, bright flavors you get from a properly done pour over are genuinely different from what any other method produces. But pour over rewards patience and attention to detail: consistent slow pours, a gram scale, a kettle with a gooseneck spout for control. Check gram scale, kettle type, and surface stability before committing to this method.
Pour over is probably not the right choice for a first-time van build where you're still figuring out systems. It's the right choice for a builder who already camps comfortably and wants to add coffee quality as the next thing to optimize.
When the Recommendation Weakens: Cases Where Manual Methods Fail
Manual brewing methods have a real failure condition, and it's worth being direct about it: they all require hot water, which requires a heat source, which in the early morning cold of a Rocky Mountain campsite at 9,000 feet elevation can require meaningful effort before you're functional.
If you camp regularly in genuinely cold conditions, below 20°F overnight, consider how the setup changes. Propane pressure drops significantly in cold weather, which means your stove may light poorly or burn inconsistently until the canister warms up. This isn't dangerous, but it's a pain when you're already cold and moving slowly. In this scenario, a 12V kettle (if your system can support it) or pre-heating water in a vacuum-insulated thermos the night before is a smarter move than fighting a propane stove at dawn.
The group-size boundary is the other real limit. Solo van lifers and couples are well-served by AeroPress or moka pot. But if you regularly travel with four or more people who all want hot coffee in the same window, you're looking at a French press or a 12V drip maker that can produce a full carafe. The French press scales better than it gets credit for: a 34-oz press makes four solid cups in about four minutes of steeping, with zero power required.
There's also a category of van lifer this guide isn't for: the person who parks full-hookup at RV parks every night, uses shore power routinely, and has 30-amp service available. If that describes your setup, an AC drip machine or even a small espresso machine is completely reasonable. The minimalist-method advice in most van life content assumes boondocking. It doesn't have to apply to you.
Practical Setup: Grinding, Water, and Storage
The grinder is where most van coffee setups fall down. Pre-ground coffee is a workable compromise, but ground coffee goes stale faster than whole beans. A quality hand grinder solves this without adding any power draw. The Timemore C2 and 1Zpresso JX are both well-regarded options in the $50 to $80 range that produce consistent grind quality without requiring electricity. They're compact enough to store in a cabinet or stuff into a gear bag.
Water temperature matters more than most people realize. You don't need a thermometer; you need a simple rule. Boil your water, then let it sit off heat for 30 to 45 seconds before pouring. That typically drops you from 212°F to somewhere in the 195 to 205°F range, which is where most extraction science lands for optimal flavor. An inexpensive instant-read thermometer can confirm this if you're precise by nature, but the wait method works in practice.
Storage is genuinely important in a small space. Whole bean coffee keeps well in an airtight container for two to three weeks at room temperature. In a van that can swing from 40°F to 100°F depending on season and parking, a vacuum-sealed container is worth the $15 to $20 it costs. Humidity and temperature cycling degrade coffee faster than either alone. Kaldi, Airscape, and Fellow Atmos all make compact canisters that fit in a standard cabinet.
And keep the footprint honest. AeroPress, hand grinder, vacuum canister, and a small kettle fit in a single shoebox-sized cabinet. That's the whole coffee system. If your current setup takes up more space than that, something is redundant.
The Bottom Line for Your Build
If you're boondocking or running on a modest solar setup, start with an AeroPress, a hand grinder like the Timemore C2, and whatever kettle you heat water in anyway. That combination costs under $100 total, takes up almost no space, and produces better coffee than most campground drip machines. For espresso drinkers with a propane stove, add a 3-cup Bialetti moka pot and you've covered every morning scenario.
If you're full-hookup most nights, don't let van life minimalism pressure you into less convenience than you actually want. A standard drip machine on shore power is fine. Just don't run it through a small inverter off battery.
The most common mistake is buying a 12V drip maker to feel like you're using a smart van-specific solution, then discovering it brews lukewarm coffee slowly and still pulls from your battery budget. It's not great, and most people who buy one eventually shelve it in favor of something simpler.