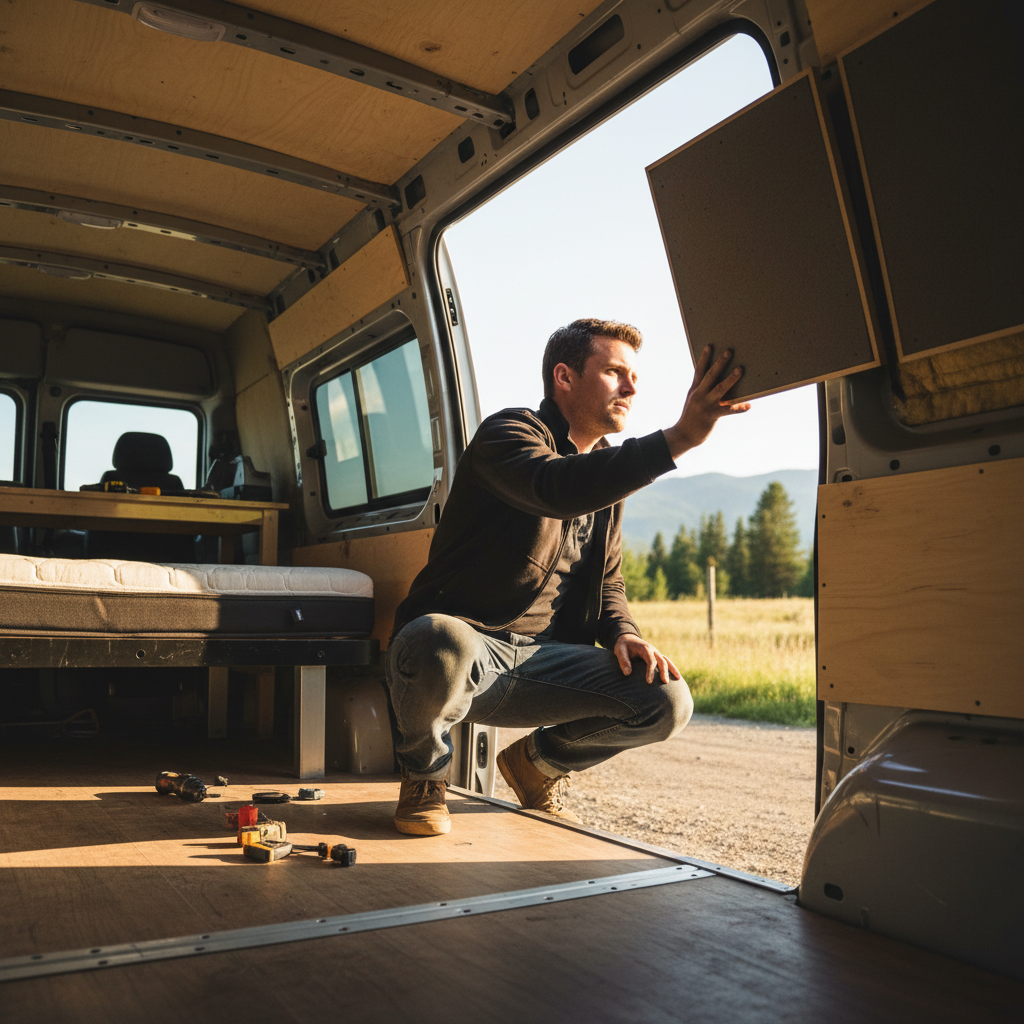
A salvage-yard cargo van with bare metal walls and a plywood floor can become a functional living or working space for less than $500, but the gap between a van that works and one that drains your wallet comes down to three decisions made before you buy a single piece of material.
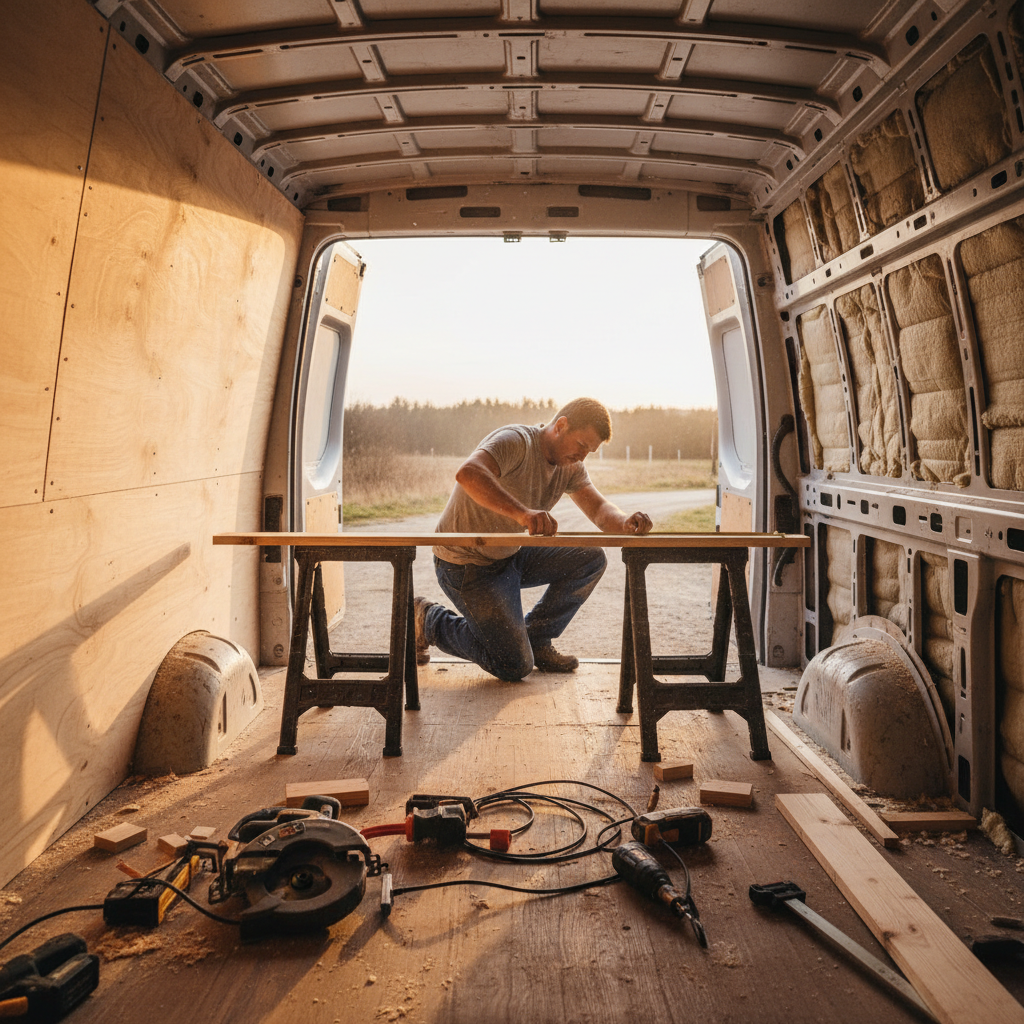
The first is whether you treat insulation as optional. The second is whether you build storage around your actual gear or around an idealized version of it. The third, and the one that kills more budget van builds than anything else, is whether you sequence the work correctly. Insulation has to go in before wall panels, wall panels before cabinetry. Reverse that order and you're paying twice.
This guide is for owners doing a partial or full interior refresh on a cargo van, a camper shell, or a full-size work van in the US. It is not for Class B motorhome renovations, Sprinter high-roof builds chasing Instagram aesthetics, or anyone with a $2,000 budget who wants permission to spend less. The math here is built around a $500 hard ceiling.
What you'll find is that $500 is enough, but only if you make the right cuts. Plenty of van conversion tutorials skip the tradeoffs entirely, listing materials without telling you which ones to drop when the cart total hits $480 and you're still missing flooring.
Why Sequencing Matters More Than the Materials List
The standard advice is to pick your insulation, flooring, and wall panels, price them out, and start buying. That advice is wrong for anyone working under a hard budget constraint, because it treats the three layers as independent decisions when they're actually a cascade.
Insulation determines wall thickness, which determines how your panels attach, which determines whether your cabinet mounts land on studs or float on foam. Get the order wrong and you lose half an inch of clearance on a sliding door, or your overhead shelf sits crooked because the wall panel behind it flexes.
I'd start with the ceiling, not the floor. Heat rises, and in a van parked in full summer sun in the South or Southwest, radiant heat through the roof is the dominant discomfort variable. A layer of 1-inch polyiso rigid foam board glued to the ceiling ribs costs roughly $25 to $35 for a standard 144-inch wheelbase van at current big-box prices, and it drops interior peak temperatures more measurably than the same dollar amount spent on floor insulation.
Or rather: the floor matters, but for a different reason. Floor insulation is primarily about moisture management and comfort underfoot, not thermal gain. A 3/8-inch layer of closed-cell foam underlayment beneath your plywood subfloor handles both for around $20. That framing separates two jobs that most budget guides lump together, which matters because if you're cutting costs, you can safely thin your floor insulation before you thin your ceiling insulation.
The walls come last among the three layers. Cargo van walls are corrugated, which means rigid board has to be cut into strips to fit between the ribs. Rockwool Safe'n'Sound or generic mineral wool batt is more forgiving here: push it into the cavities, and it conforms. Budget around $60 to $80 for wall cavities on a full-size van. Don't over-insulate the walls at the expense of the ceiling. That's the sequence mistake that costs money.
The $500 Budget Broken Down by Category
Here is a realistic allocation for a standard 148-inch wheelbase cargo van interior refresh. These are working estimates based on current US retail pricing at Home Depot, Lowe's, and common online suppliers as of mid-2020s. Prices vary by region; the South and Midwest generally run 5 to 10 percent cheaper than the Pacific Coast on construction materials.
| Category | What to Buy | Estimated Cost |
|---|---|---|
| Ceiling insulation | 1-inch polyiso rigid foam, one 4×8 sheet cut to fit | $30 |
| Floor insulation + subfloor | 3/8-inch foam underlayment + 3/4-inch plywood (one sheet) | $55 |
| Wall insulation | Mineral wool batt, two bags | $70 |
| Wall panels | 1/4-inch luan plywood or thin pine boards, primed and painted | $80 |
| Flooring surface | Peel-and-stick vinyl plank or sheet vinyl | $60 |
| Storage (DIY shelving) | 2×4 lumber, pocket screws, plywood offcuts | $75 |
| Lighting | 12V LED strip lights, adhesive-mount, with inline switch | $30 |
| Fasteners, adhesive, weatherstrip | Gorilla construction adhesive, self-tapping screws, foam tape | $40 |
| Contingency | Spare materials, hardware swaps | $60 |
| Total | $500 |
That table leaves zero slack for mistakes on the big-ticket items. The contingency line is not optional spending money. It is the buffer that absorbs the one cut you measured wrong and the one screw pack that wasn't enough. If you find cheaper flooring or score free plywood offcuts from a local cabinet shop (worth asking), roll the savings into the contingency, not into a category you've already allocated.
The derived math here matters: insulation, panels, and flooring together consume $295, or about 59 percent of the total budget. Storage and lighting take another $105. That split means any attempt to add a feature outside these five categories, say a curtain track system or a folding table mount, requires cutting from somewhere else. There's no hidden margin.
Storage: Build Around What You Actually Carry
The most common storage mistake in budget van builds is building a system before deciding what it needs to hold. Shelving that looks clean in photos but can't secure a cooler or a tool bag during cornering is a waste of $75 in lumber.
Before cutting anything, list your actual carried items: dimensions, weight, and whether they need to be accessible while the van is loaded or only at a destination. That list drives three decisions: shelf height, whether you need a lip or a retention strap, and whether a single long shelf beats two shorter ones.
For most work vans and part-time camper builds, a single L-shaped shelf unit running along the driver-side wall from the rear door to the B-pillar handles 80 percent of storage needs. Built from 2×4 framing and 3/4-inch plywood, with pocket-screw joints, it's rigid enough to support 150 pounds without wobbling. Budget $75 in lumber at current retail, less if you have offcuts or access to a lumber yard that sells shorts.
What you don't need at this budget: a permanent bed platform (use a cot or folding mattress instead), a fixed table (a folding camp table stored under the shelf costs $25 and takes five seconds to deploy), or a full overhead cabinet system. Each of those items pushes you $100 to $200 past the budget ceiling. Cut them entirely for this build.
If you skip the storage section entirely and rely on plastic totes stacked loose in the cargo area, you'll spend the first three months sliding totes into your wheel wells on every hard stop. That's not a comfort issue. It's a hazard. Unsecured cargo in a cargo van transfers forward at roughly the same deceleration rate as the van itself, which means a 40-pound tote becomes a projectile in a sudden braking event.
Lighting and the One Electrical Decision You Have to Get Right
Twelve-volt LED strip lighting is the correct choice for a budget van build. Full stop. Running 120V AC power requires either shore power hookup or an inverter, both of which add cost and complexity that a $500 build cannot absorb.
A 16-foot reel of 12V warm-white LED strip with an inline on/off switch costs between $15 and $30 online or at a big-box store. Run it along the ceiling edge on one or both sides, secure it with the adhesive backing plus a few cable staples, and wire it directly to the van's auxiliary battery terminal or, on simpler builds, to a dedicated switch tapped off the main battery with an inline fuse.
The one decision you cannot defer is fusing. Every 12V circuit in a vehicle must be fused as close to the power source as possible, typically within 18 inches of the battery terminal. This is not a stylistic preference or a suggestion from van life forums. It is a basic wiring requirement consistent with automotive electrical safety practice. An unfused wire that chafes against a metal edge becomes an ignition source. On a van with freshly installed foam insulation, that risk is not abstract.
Use a blade fuse holder and a 5-amp fuse for a single LED strip run. Total added cost: around $3. That framing separates the two most common DIY lighting errors: under-fusing (using too high an amp rating) and not fusing at all.
Beyond lighting, resist the urge to add a USB charging station, a 12V refrigerator outlet, or a secondary battery at this budget. Each of those is a legitimate next-phase upgrade. At $500 total, they belong on the list for phase two, not phase one.
Where This Budget Fails and What to Do About It
A $500 interior budget works well for standard cargo vans in reasonable condition. It weakens significantly in three situations: rust on the floor or walls, a van with existing interior components that need removal and disposal, and extreme climate zones where thin insulation is genuinely inadequate.
Rust changes the math because surface rust that's merely aesthetic costs nothing to manage during a build. But structural rust beneath the floor pan, or rust-through on the wall ribs, requires treatment before you seal it under plywood and foam. Rust converter and self-etching primer add $30 to $50 to the project, which comes directly out of the contingency. If the floor has more than superficial rust, you need to either address it or accept that you're building on a deteriorating substrate. The second option is a reasonable short-term choice on a high-mileage work van you expect to keep for two years. It's a poor choice on a vehicle you're planning to live in.
Extreme heat climates (think Phoenix in July, where ambient temperatures regularly exceed 110°F) genuinely require more than 1-inch polyiso in the ceiling. Upgrading to 2-inch polyiso adds roughly $30 to $40 to the ceiling line item, but that cost has to come from somewhere. Floor insulation is the correct place to thin the budget in this case: drop from 3/8-inch underlayment to a thinner foam sheet and save $10 to $15. The ceiling-floor tradeoff holds.
Cold-climate builds face the inverse problem. The Pacific Northwest and upper Midwest in winter require vapor barriers on the walls to prevent condensation inside the insulation cavity. A roll of 6-mil poly sheeting costs around $15 and fits within the contingency. Skip it and you'll have wet mineral wool behind your wall panels within one winter season, which means mold, odor, and a full tear-out.
Making It Last: Finishing Details That Are Worth the Cost
Three finishing details separate a van build that holds up for three years from one that starts coming apart in eighteen months: edge treatment on exposed plywood, wall panel attachment method, and door seal condition.
Raw plywood edges wick moisture and splinter. Iron-on edge banding costs around $8 for a 25-foot roll and takes twenty minutes to apply. Every exposed plywood edge in the build gets it. This is not aesthetic; it's structural longevity.
Wall panels attached only with adhesive will eventually pop, especially in climates with significant temperature swings, because van interiors cycle through wide thermal ranges. A self-tapping screw every 12 inches through the panel into the van's structural rib, combined with construction adhesive, holds indefinitely. The adhesive alone won't. Plan on a full box of #8 self-tapping screws in your fastener budget.
And check your door seals before you start the build, not after. A rear door seal that leaks means water under your new floor within the first rainstorm. Replacement van door seals run $20 to $60 depending on van make and model. If yours are cracked or compressed, replace them before the flooring goes in. Discovering a wet floor two weeks after finishing the build and having to pull it up is a pain that no contingency budget can fix after the fact.
The reframe that changes how to think about this project: a van interior upgrade under $500 is not a cheap version of a full conversion. It's a complete, bounded system with its own logic, and the logic is sequencing over features every time.